I've been working with ESP8266 and ESP32 for some times now. Until now, I used the Arduino framework, mostly because it's easy : it provides a lot of services and libraries, allowing me to go straight to the point and concentrate on my own code.
But I like to understand what lies underneath the top-layers, get closer to the metal, the transistors, the peripherals and the registers. For that, Espressif provides a well-documented SDK, and for which a lot of resources are available online.
This framework, name ESP-IDF ("Ce framework, nommé ESP-IDF ("Espressif IoT Development Framework") provides toolchains and tools allowing the development of application for ESP32 MCU. In fact, the Arduino framework integrates this SDK to provide a higher-level API, and compatible with other platforms
When I installed the IDF, I was surprised (in a very good way) to find CMake files! CMake is an open-source tool to manager the build process of a project, especially for C++ projects. And CMake is natively supported by my favorite IDE : CLion.
So, shouldn't it be possible to create, edit, build and run an ESP-IDF project in CLion ? That's what we are going to see! (TL;DR : the answer is 'YES'!).
Installing ESP-IDF
I won't go into details, everything is very well documented in the official documentation. A whole new section is dedicated to the CMake preview. CMake is still in beta in IDF version 3.3+, and will be fully avaiable in version 4. FYI, I git cloned from branch master, and I got the following version:
v3.3-beta1-177-g456efd3d5Opening a CMake ESP-IDF project with CLion
In fact, once the IDF is correctly installed, it is very simple to open a CMake project with CLion, because the examples provided by the IDF are already compatibles.
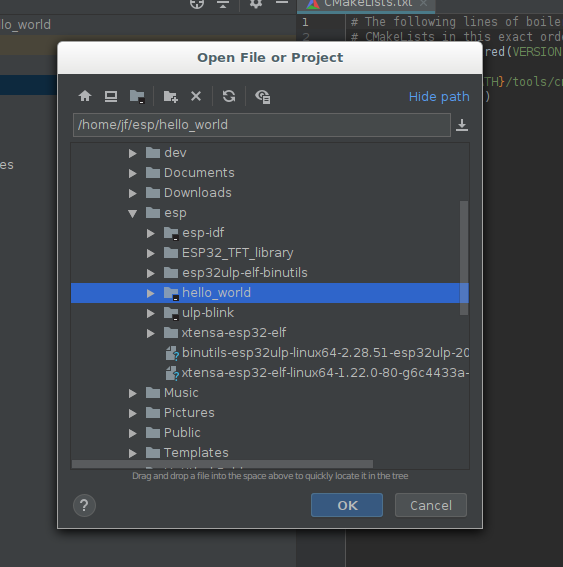
For example, we will start from the "hello_world" project provided by the sources of the IDF (/examples/get-started/hello_world). All you have to do is copying this directory into the installation directory of the IDF and the toolchain (the documentation recommends /home/<you>/esp). In my case:
$ cp -R ~/esp/esp-idf/examples/get-started/hello_world ~/esp/Start then CLion and open the project (File -> Open... and select the directory of the project (~/esp/hello_world) or the main CMake file (~/esp/hello_world/CMakeLists.txt).
CLion analyzes the projet, but, unfortunately, in my case, it failed because CMake coudn't find the directory of the IDF and toolchain, even if I've already defined the environment variables...
The solution I found consists in defining this environment variable in the CLion project, via File -> Settings -> Build, Execution, Deployment -> CMake -> Environment
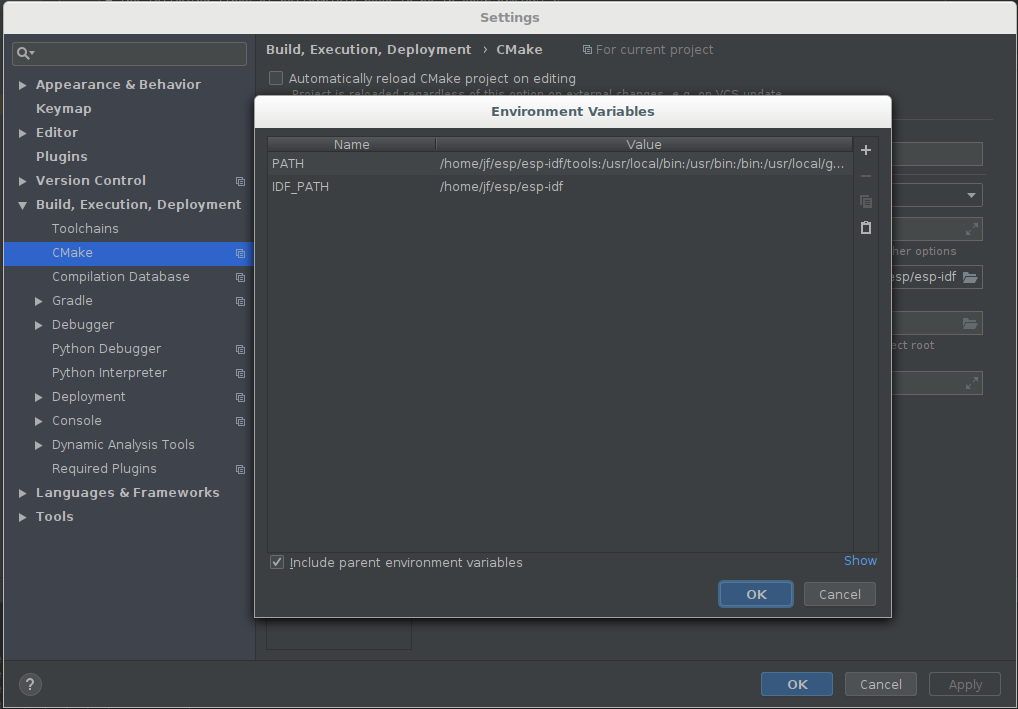
- PATH = /home/jf/esp/esp-idf/tools:/home/jf/esp/xtensa-esp32-elf/bin
- IDF_PATH = /home/jf/esp/esp-idf
After "Clear cache and reload CMake project", CLion should detect all the targets necessary to build and upload the project.
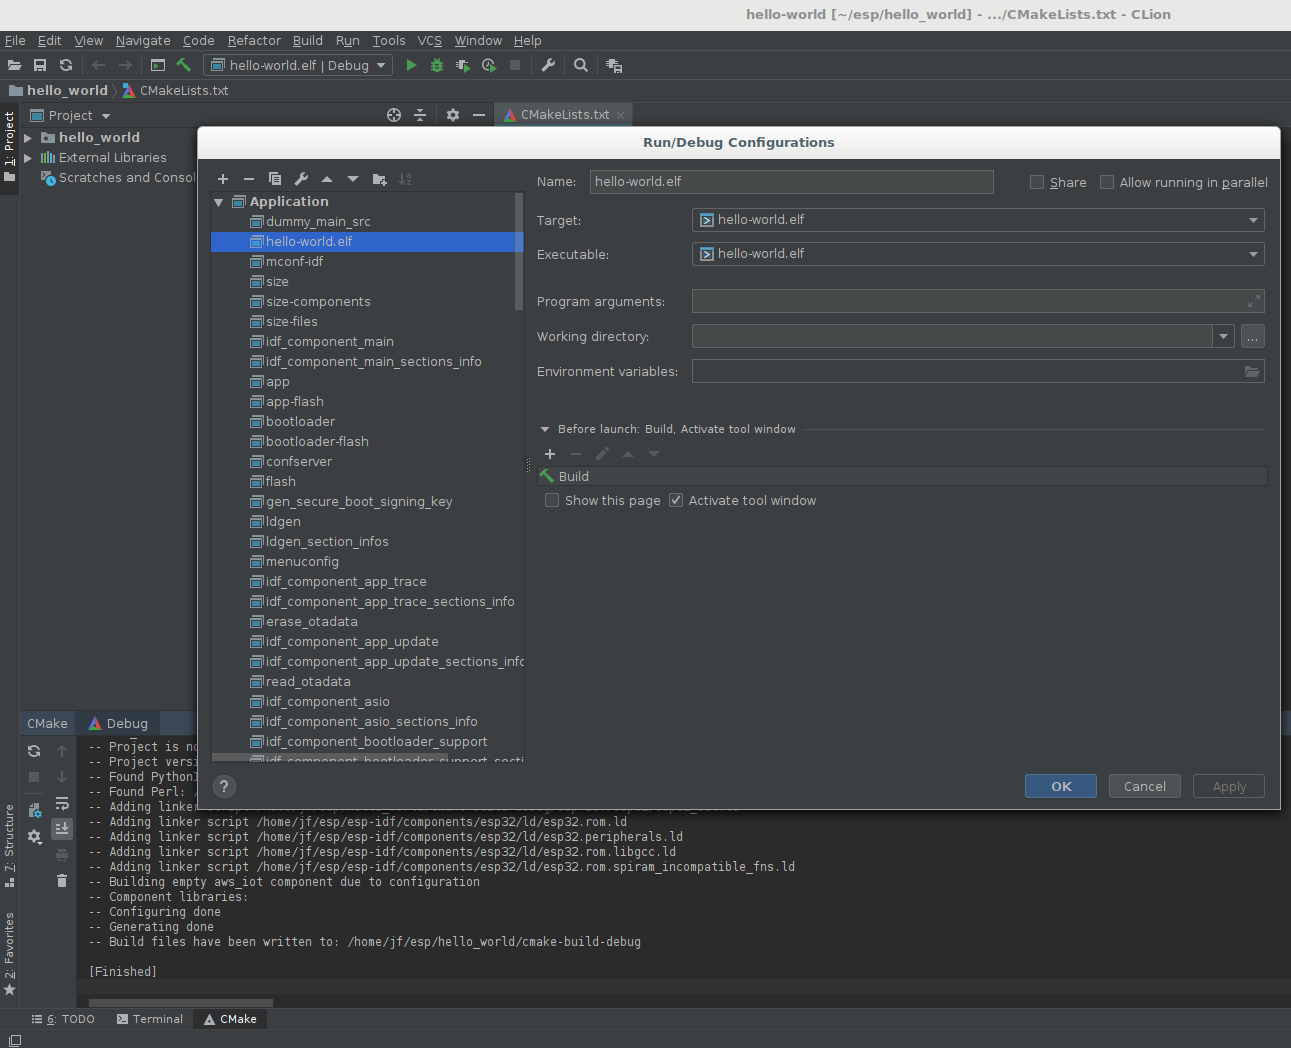
In the list of targets, you'll find the same targets than the one available in the 'Makefile' IDF : app, flash,... If you 'build' the target flash, for example, it'll build the whole application and upload it into the MCU memory.
Build and upoad
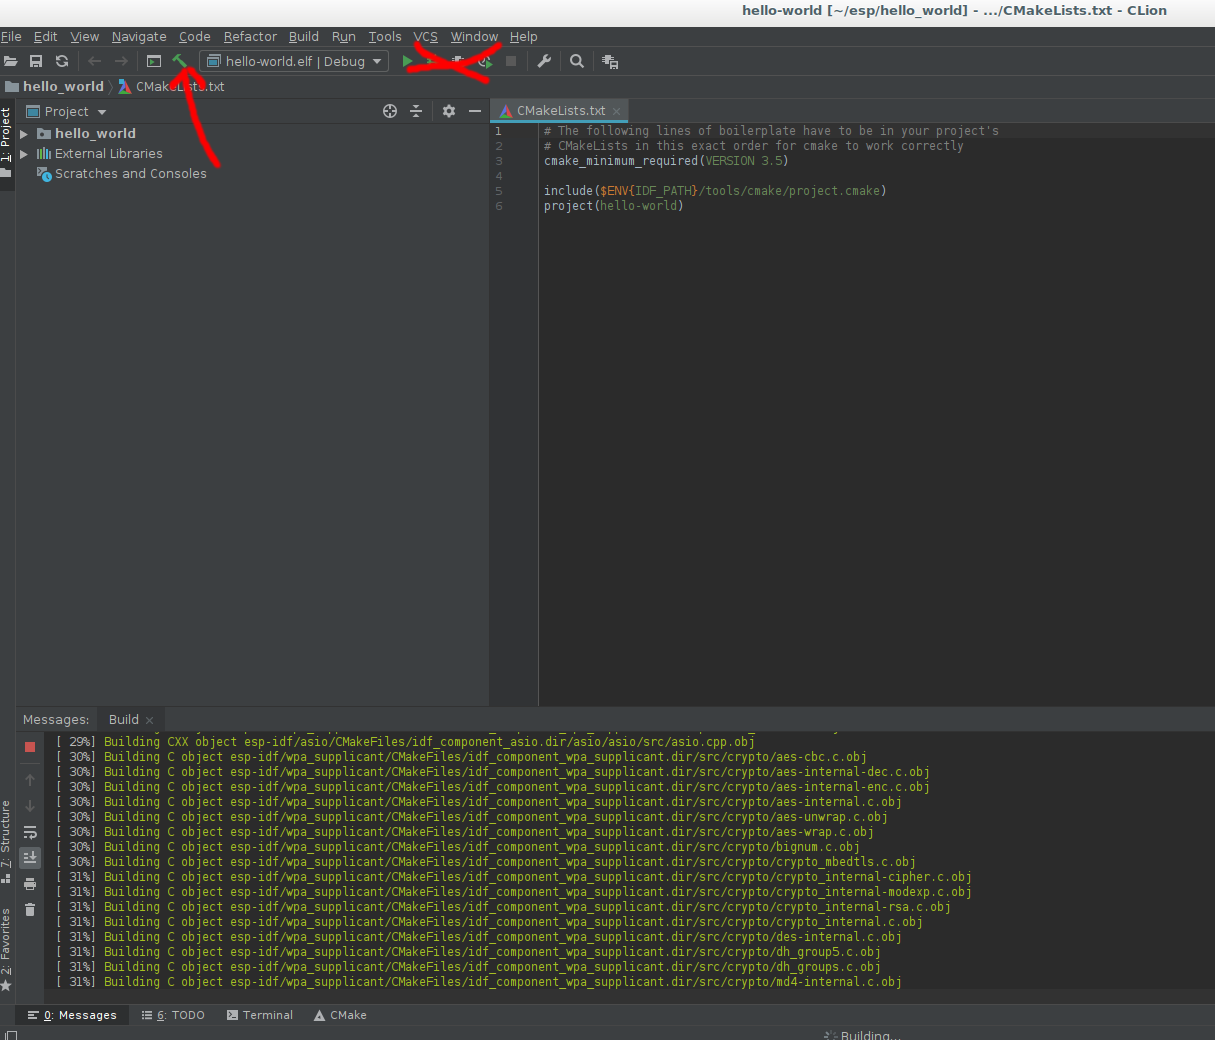
You can now use these targets to build and upload the project into your ESP32. Small detail : this targets only work with the button Build and not with Run. This is because they call scripts from the IDF, they to not call the compiler and the executable directly.
Going further
I still have to find a better solution regarding the definition of the environment variable
Regarding the CMake project, I found another example in the examples provided by the IDF (IDF_PATH/examples/build_system/cmake) that seems to go further (idf as a lib), but I didn't have the time to have a look for now...
Please share your discovery about CMake in the IDF!