BL602/604 is a RISC-V MCU by Bouffalolab. It’s integrated in the PineCone devboard by Pine64 , as well as in the PineDio STACK .
This is a relatively new chip : developer tools are not mature yet and the documentation is often a bit lacking. This makes the developer experience not as comfortable is it should be.
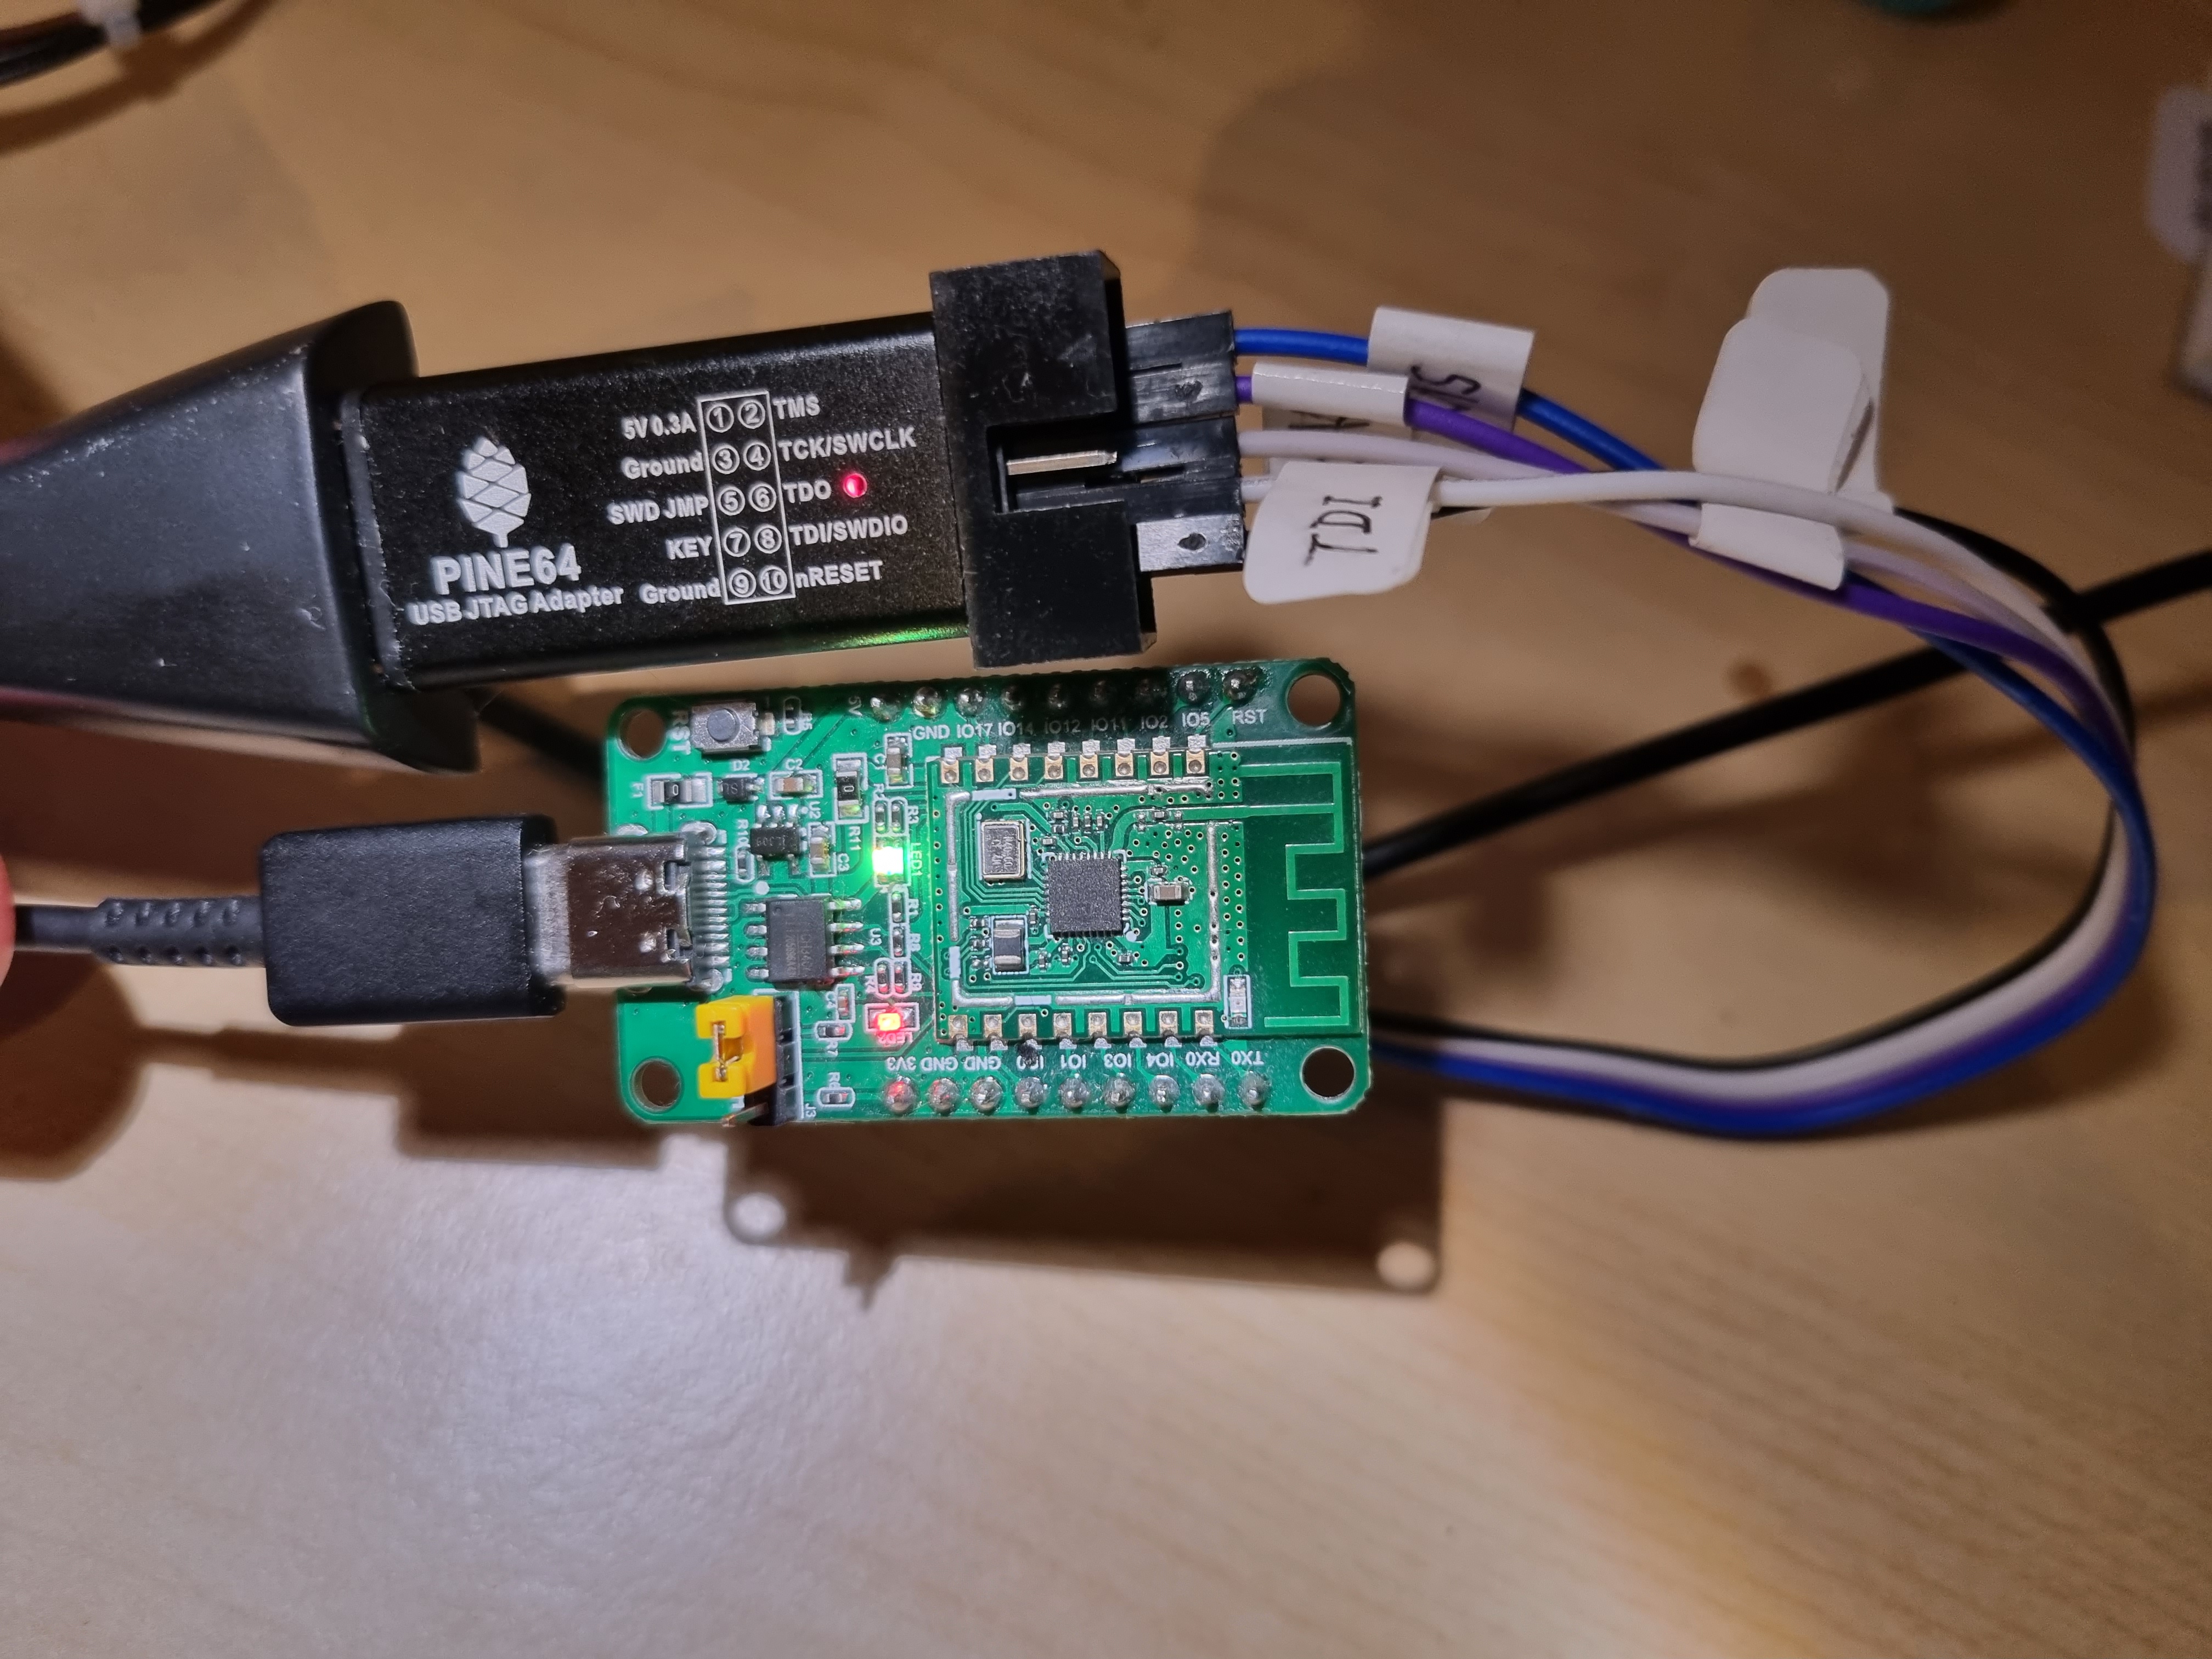
In this article, I’ll detail how to wire the PineCone to a JTAG adapter (the Pine64 USB JTAG adapter ), and how to setup OpenOCD and GDB to debug the code running on it.
Connect the PineCone to the JTAG adapter
Lup Yuen explains this far better than me in this article .
Basically, the pin mapping is:
| JTAG Debugger | PineCone Pin |
|---|---|
| TDO | IO 11 |
| TMS | IO 12 |
| TCK | IO 14 |
| TDI | IO 17 |
| GND | GND |
OpenOCD
OpenOCD is an open source tool that supports flashing and debugging many platforms using JTAG and SWD debug probes.
To run it, we need 2 configuration files. The first one describes the debug probe, and the other one the target.
Let’s start with the configuration file for the debug probe : pine64.cfg :
interface ftdi
ftdi_vid_pid 0x0403 0x6014

ftdi_channel 0
transport select jtag
adapter_khz     2000
Of course, you might need another file if you use another debug probe. The Bouffalo MCU SDK provides a couple of configuration files here (if_bflb_dbg.cfg and if_rv_dbg_plus.cfg).
The configuration file for the target is a bit longer. It’s also available in the Bouffalo SDK here .
However, we’ll need to apply a slight modification to this file : tgt_602.cfg :
target chip
set _CHIPNAME riscv
jtag newtap $_CHIPNAME cpu -irlen 5 -expected-id 0x20000c05
set _TARGETNAME $_CHIPNAME.cpu
target create $_TARGETNAME.0 riscv -chain-position $_TARGETNAME
$_TARGETNAME.0 configure -work-area-phys 0x22020000 -work-area-size 0x10000 -work-area-backup 1
#$_TARGETNAME.0 configure -rtos auto
echo "Ready for Remote Connections"
$_TARGETNAME.0 configure -event reset-assert-pre {
echo "reset-assert-pre"
adapter speed 100
}
$_TARGETNAME.0 configure -event reset-deassert-post {
echo "reset-deassert-post"
adapter speed 2000
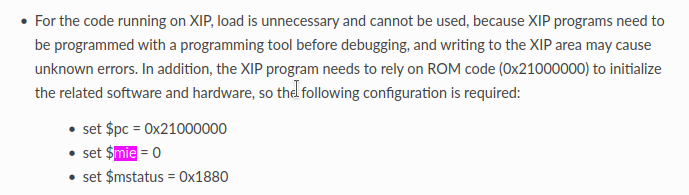
reg mstatus 0x1880 # <<< Edit this line
reg mie 0x0 # <<< Edit this line also
reg pc 0x21000000 # <<< And don't forget this one
}
$_TARGETNAME.0 configure -event reset-init {
echo "reset-init"
# 4MHz for FPGA
adapter speed 2000
}
gdb_memory_map enable
gdb_flash_program disable
riscv set_prefer_sba on
riscv set_command_timeout_sec 1
init
reset init
#jtag arp_init
#resume
#exit
See those 3 lines in reset-deassert-post ? They allow to properly reset the chip when it’s executing code from the internal flash memory. Without those changes, OpenOCD and GDB won’t be able to reset the chip, and it will simply crash on boot.
This information is documented in the Introduction to OpenOCD and GDB from Bouffalo but… it took me some time to find it and understand that it will resolve my reset issue!
Now, we can run OpenOCD using this command line:
$ openocd -f ./pine64.cfg -f ./tgt_602.cfg
GDB
GDB is the GNU debugger. You probably use it to debug software running on your local computer. GDB can also do remote debugging, and, thanks to OpenOCD, it can debug code running on your embedded system.
A configuration file is also needed for GDB. This file describes the memory mapping and a few other internal parameters of the MCU that I haven’t tried to understand so far :-D.
This file is also available in the MCU SDK here . I applied no change to this file: 602.init :
set architecture riscv:rv32
#target remote :3333
#set disassemble-next-line on
set mem inaccessible-by-default off
#gdb_breakpoint_override [hard|soft|disable]

mem 0x22008000 0x22014000 rw
mem 0x42008000 0x42014000 rw
mem 0x22014000 0x22020000 rw
mem 0x42014000 0x42020000 rw
mem 0x22020000 0x22030000 rw
mem 0x42020000 0x42030000 rw
mem 0x22030000 0x2204C000 rw
mem 0x42030000 0x4204C000 rw
mem 0x23000000 0x23400000 ro
We can run GDB with this command line:
$ riscv64-unknown-elf-gdb -x 602.init
In the GDB prompt, let’s first connect to the target using the port opened by OpenOCD (3333):
(gdb) target extended-remote :3333
Then we can specify the binary file the target is currently running:
(gdb) file your-binary-file.elf
And we are good to go and debug our application:
GNU gdb (SiFive GDB 9.1.0-2020.08.2) 9.1
Copyright (C) 2020 Free Software Foundation, Inc.
License GPLv3+: GNU GPL version 3 or later <http://gnu.org/licenses/gpl.html>
This is free software: you are free to change and redistribute it.
There is NO WARRANTY, to the extent permitted by law.
Type "show copying" and "show warranty" for details.
This GDB was configured as "--host=x86_64-linux-gnu --target=riscv64-unknown-elf".
Type "show configuration" for configuration details.
For bug reporting instructions, please see:
<https://github.com/sifive/freedom-tools/issues>.
Find the GDB manual and other documentation resources online at:
    <http://www.gnu.org/software/gdb/documentation/>.

For help, type "help".
Type "apropos word" to search for commands related to "word".
The target architecture is assumed to be riscv:rv32
(gdb) target extended-remote :3333
Remote debugging using :3333
warning: No executable has been specified and target does not support
determining executable automatically.  Try using the "file" command.
0x21000000 in ?? ()
(gdb) file /home/jf/git/myapp/cmake-build-debug/myapp.elf
A program is being debugged already.
Are you sure you want to change the file? (y or n) y
Reading symbols from /home/jf/git/myapp/cmake-build-debug/myapp.elf...
(gdb) b main
Breakpoint 1 at 0x23000154: file /home/jf/git/myapp/main.cpp, line 9.
(gdb) r
The program being debugged has been started already.
Start it from the beginning? (y or n) y
Starting program: myapp.elf
Note: automatically using hardware breakpoints for read-only addresses.

Breakpoint 1, main () at /home/jf/git/myapp/main.cpp:9
warning: Source file is more recent than executable.
9         int i = 0;
(gdb)
Flash your firmware into the chip
Unfortunately, I haven’t figured out a way (yet?) to flash the firmware using JTAG and OpenOCD/GDB. The flash memory of the BL602 apparently need code to initialize and work and cannot be directly driven by the MCU.
You’ll need to use another tool to flash your firmware over the serial port (via the onboard USB adapter). I personally use blflash , but you can use any other compatible tool of your choice.