Introduction
I’ve been using ARM based SBCs (RaspberryPi, Odroid, Quartz64, NanoPi) as home servers for quite some time now. I use them to host my NAS, backups, Home-Assistant, MQTT broker, Matrix home server…
ARM CPUs are becoming more and more powerful, support more and more memory and provide more and more I/Os, which enable new use-cases and functionalities.
The Rockchip RK3588 is probably one of the most powerful of such CPU that are available to the general public. It’s a strong chip that hosts 8 AACH64 cores, supports up to 32GB of RAM and bundles quite a lot of I/O and peripherals : GPU, TPU, PCIe, GBe, USB2/3, SATA,… Everything needed to build a strong desktop computer, a virtualization server, or many other projects.
I have already done some experiments with the RK3588 using the QuartzPro64 board from Pine64 . The mainlining efforts keep on progressing and most of the RK3588 is now supported on mainline Linux. PCIe, USB, network interfaces, thermal management, frequency scaling, SATA and many other parts of the CPU are now supported. Even the HDMI output is working! I think the last important missing bit is the GPU, but I understand that some work is already in progress on that topic!
Using an RK3588 board without GPU as a desktop computer works but… it’s not great : animations are glitchy, playing a video uses a lot of CPU resources and it feels sluggish, even on such a powerful CPU. But for many other purposes, the GPU is not needed.
In this series of post, I’ll explore using an RK3588 SBC to run multiple containers and VMs on Proxmox. My end goal consists in running Frigate (open source local NVR that uses AI for object detection and that integrates nicely with Home-Asssitant) and Forgejo and Woodpecker to build a local CI/CD pipeline for my own software developments
The QuartzPro64 is a really nice board, but it’s not really convenient when it comes to mount it in a case and keep it running 24/7. So I decided to buy another board : the OrangePi 5+ with 32GB of RAM memory . I gifted it to myself for Christmas. I chose the bundle with the aluminum case, the 256GB eMMC module and the WiFi card.
/TODO Add pictures of the board and the case
In this series of posts, I’ll document
-
How I setup Armbian and Proxmox on the board (this post)
-
The installation of Frigate NVR with a Coral TPU to improve the performance of the detection
Hardware setup
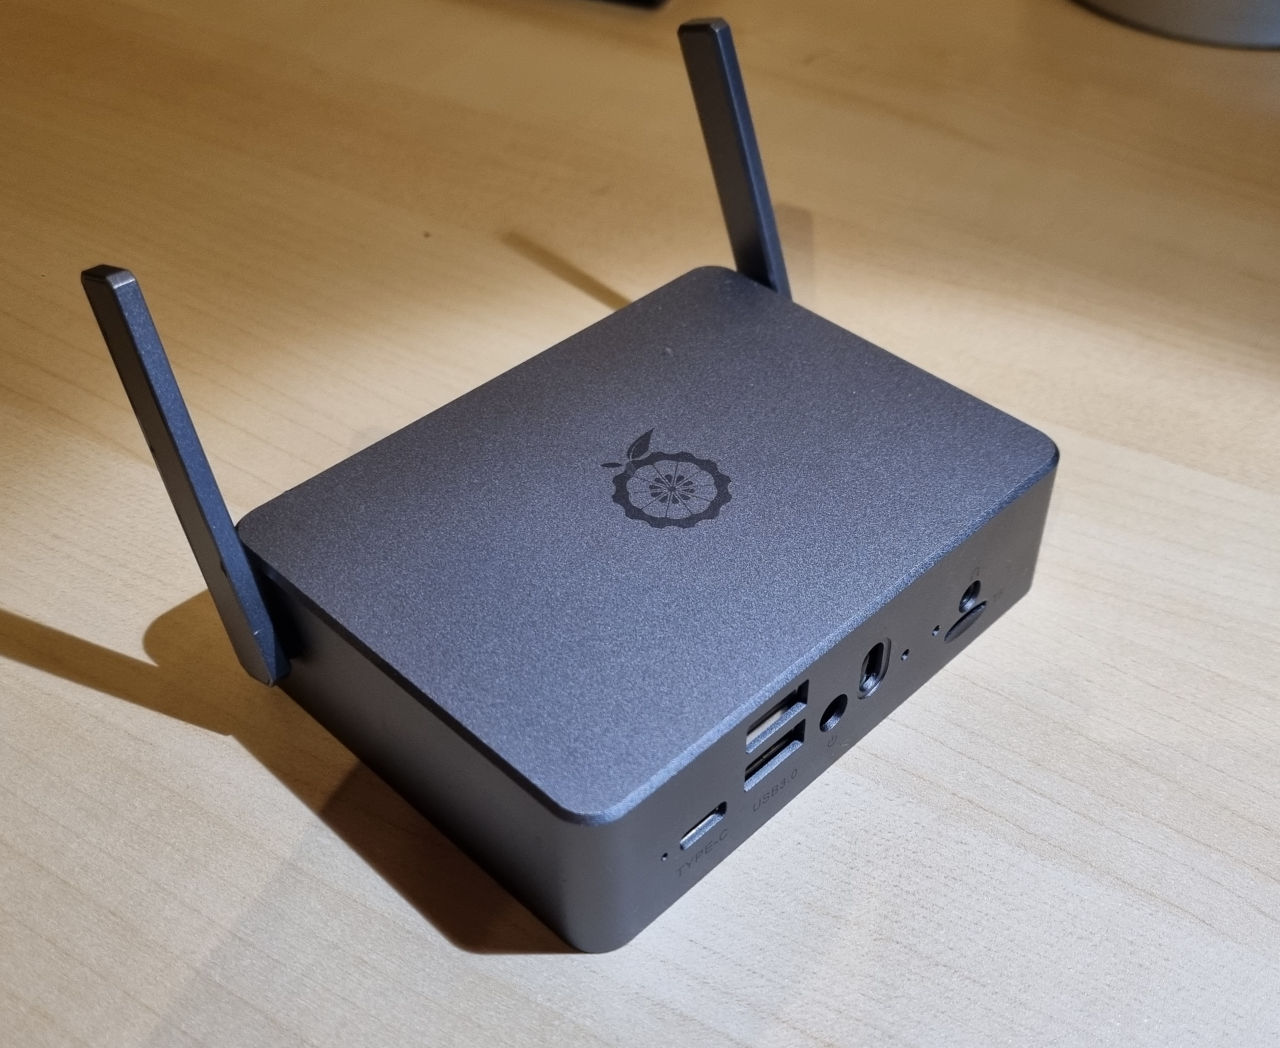
The aluminum case looks pretty good and acts as a heat spreader. It exposes a USB-C port, 2 USB3 ports, the power button, the IR receiver, the audio port and the micro SD slot.
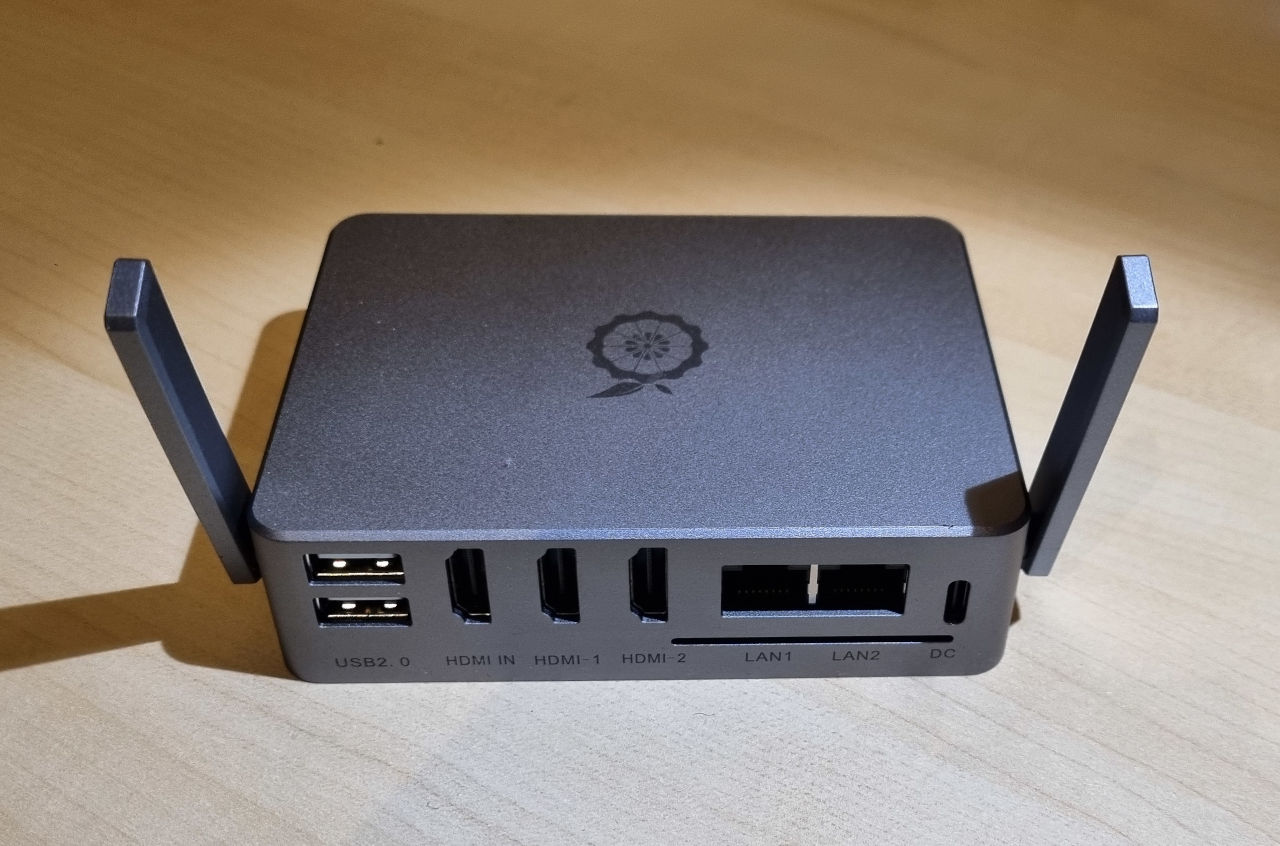
The back exposes 2 USB2 ports, 2 HDMI outs and 1 HDMI in, 2 RJ45 (2.5G LAN), a USB-C port (for power) and a slot for display/camera flat cables. The case is also equipped with 2 WiFi antennas.
The case opens by removing the bottom plate (there are 4 screws). The SSD NVMe slot is easily accessible without having to remove the board from the case.
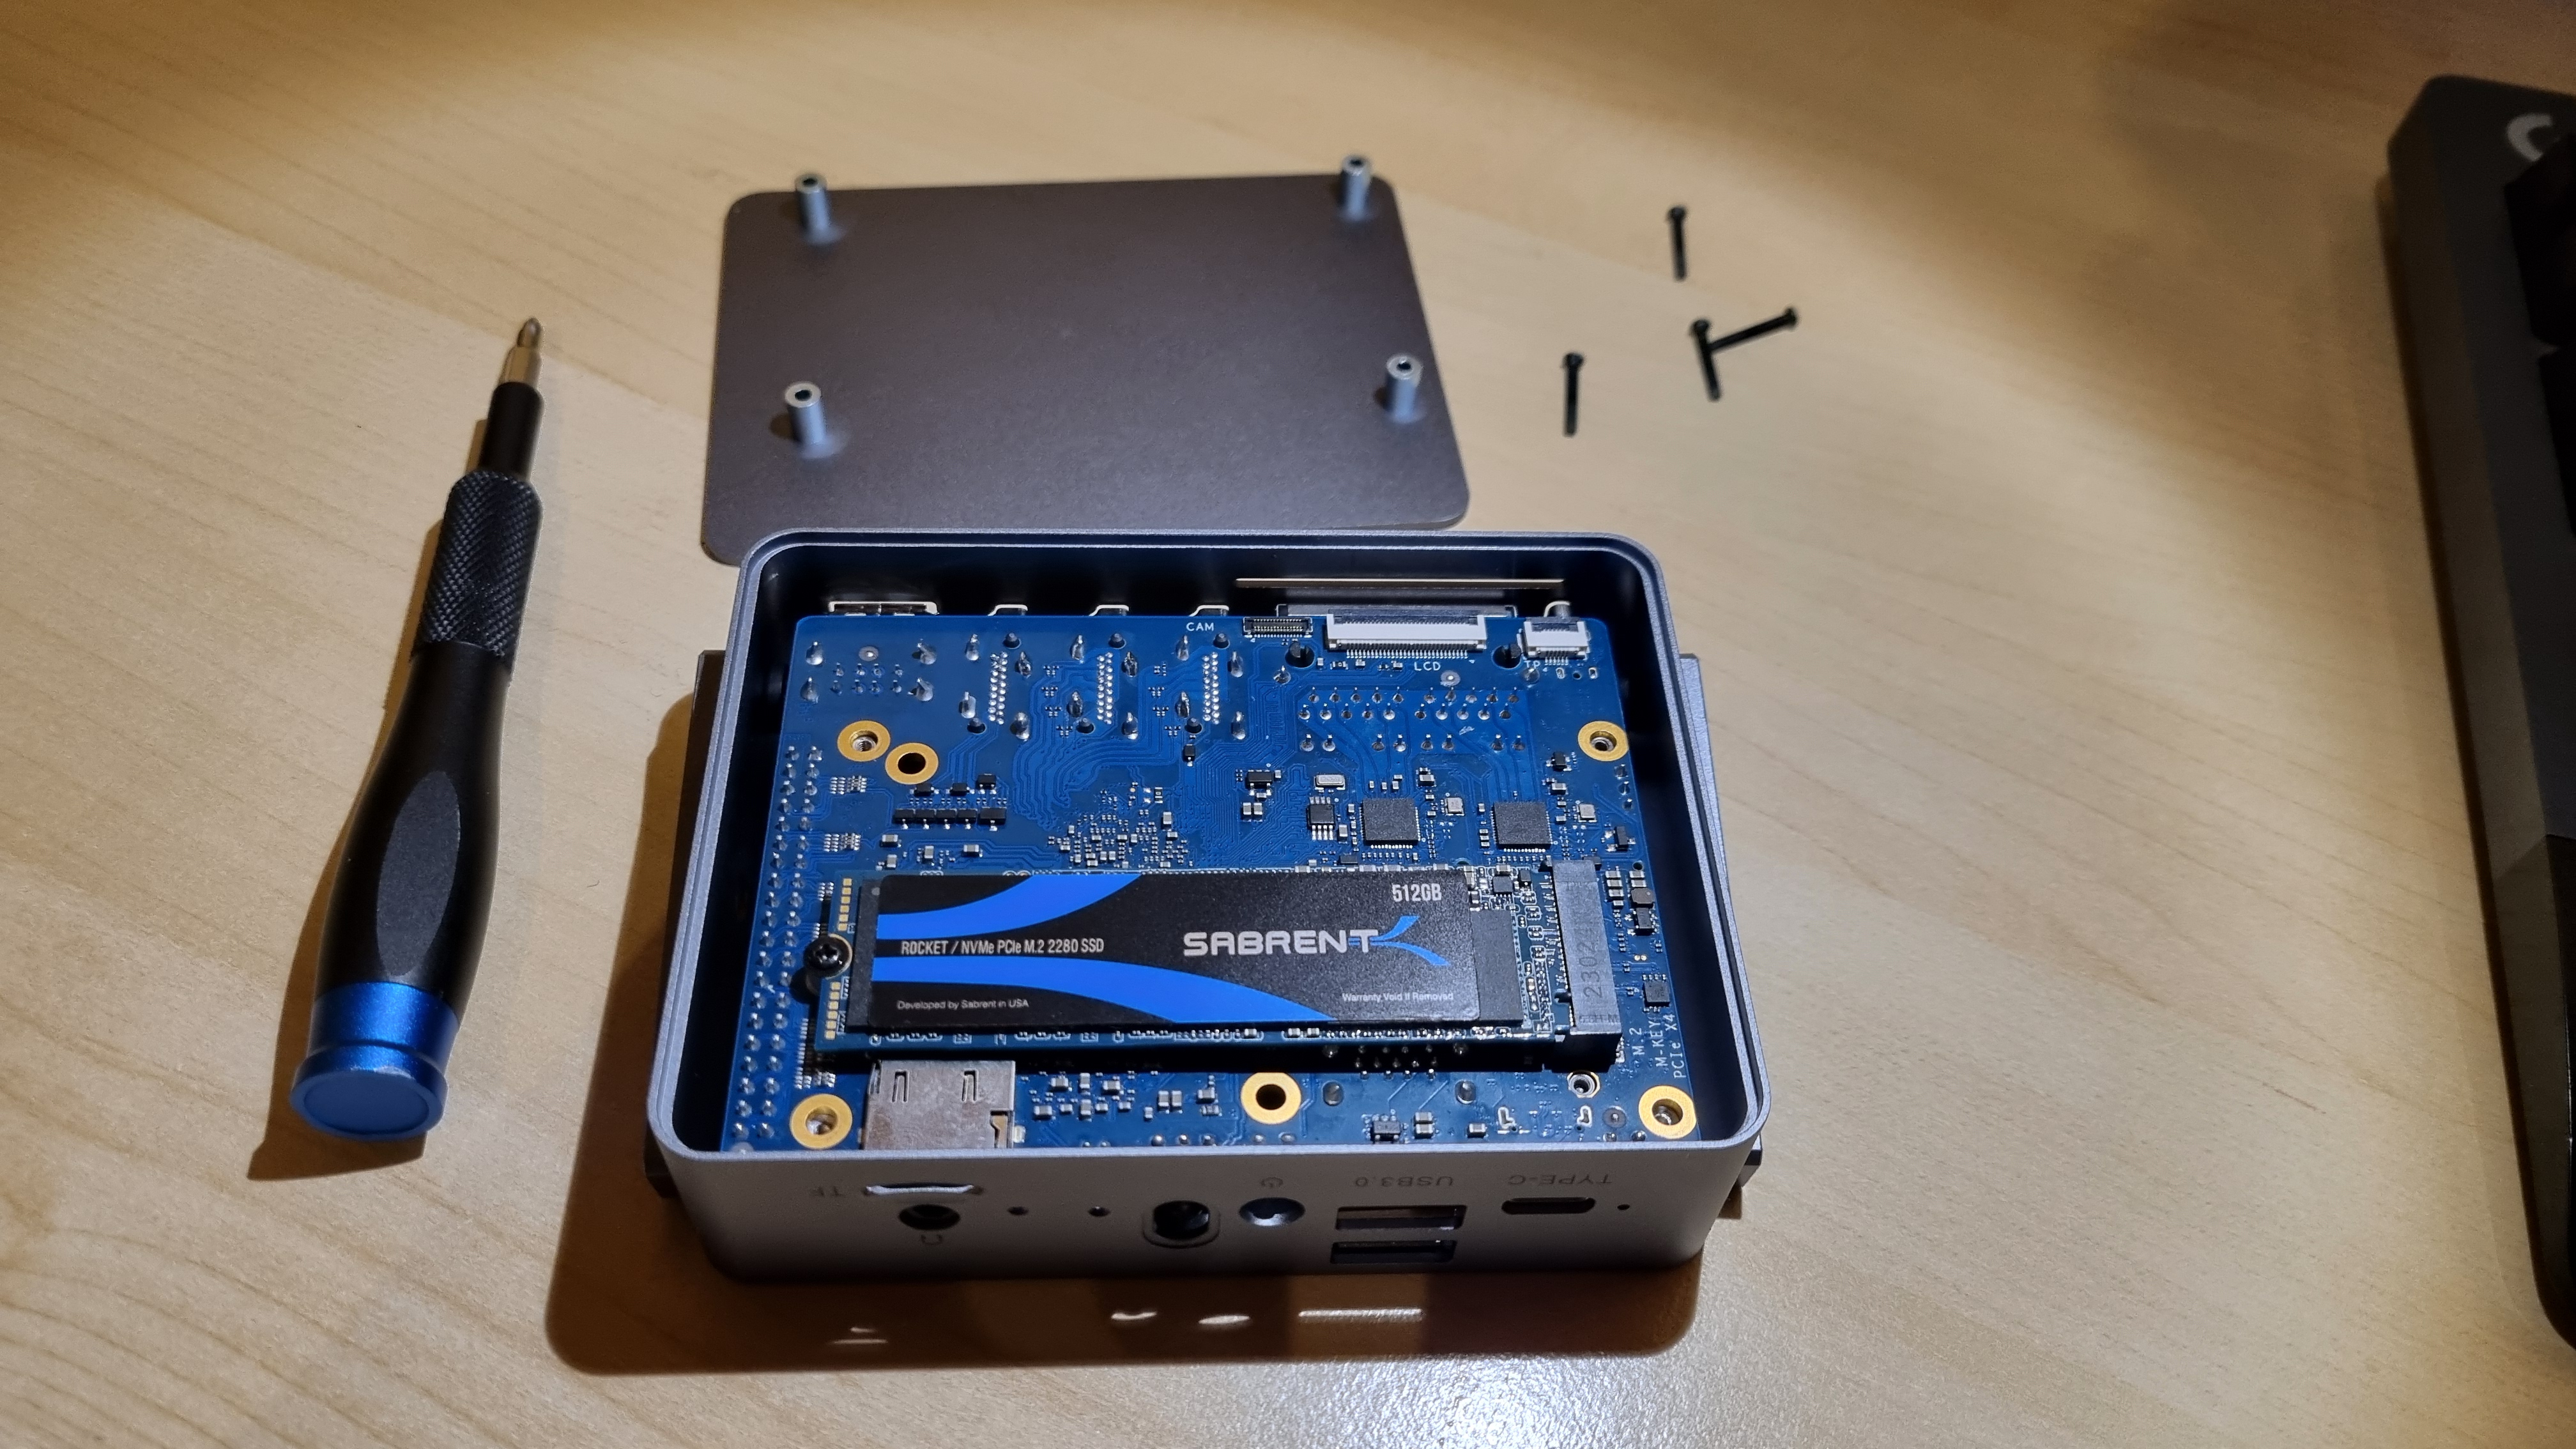
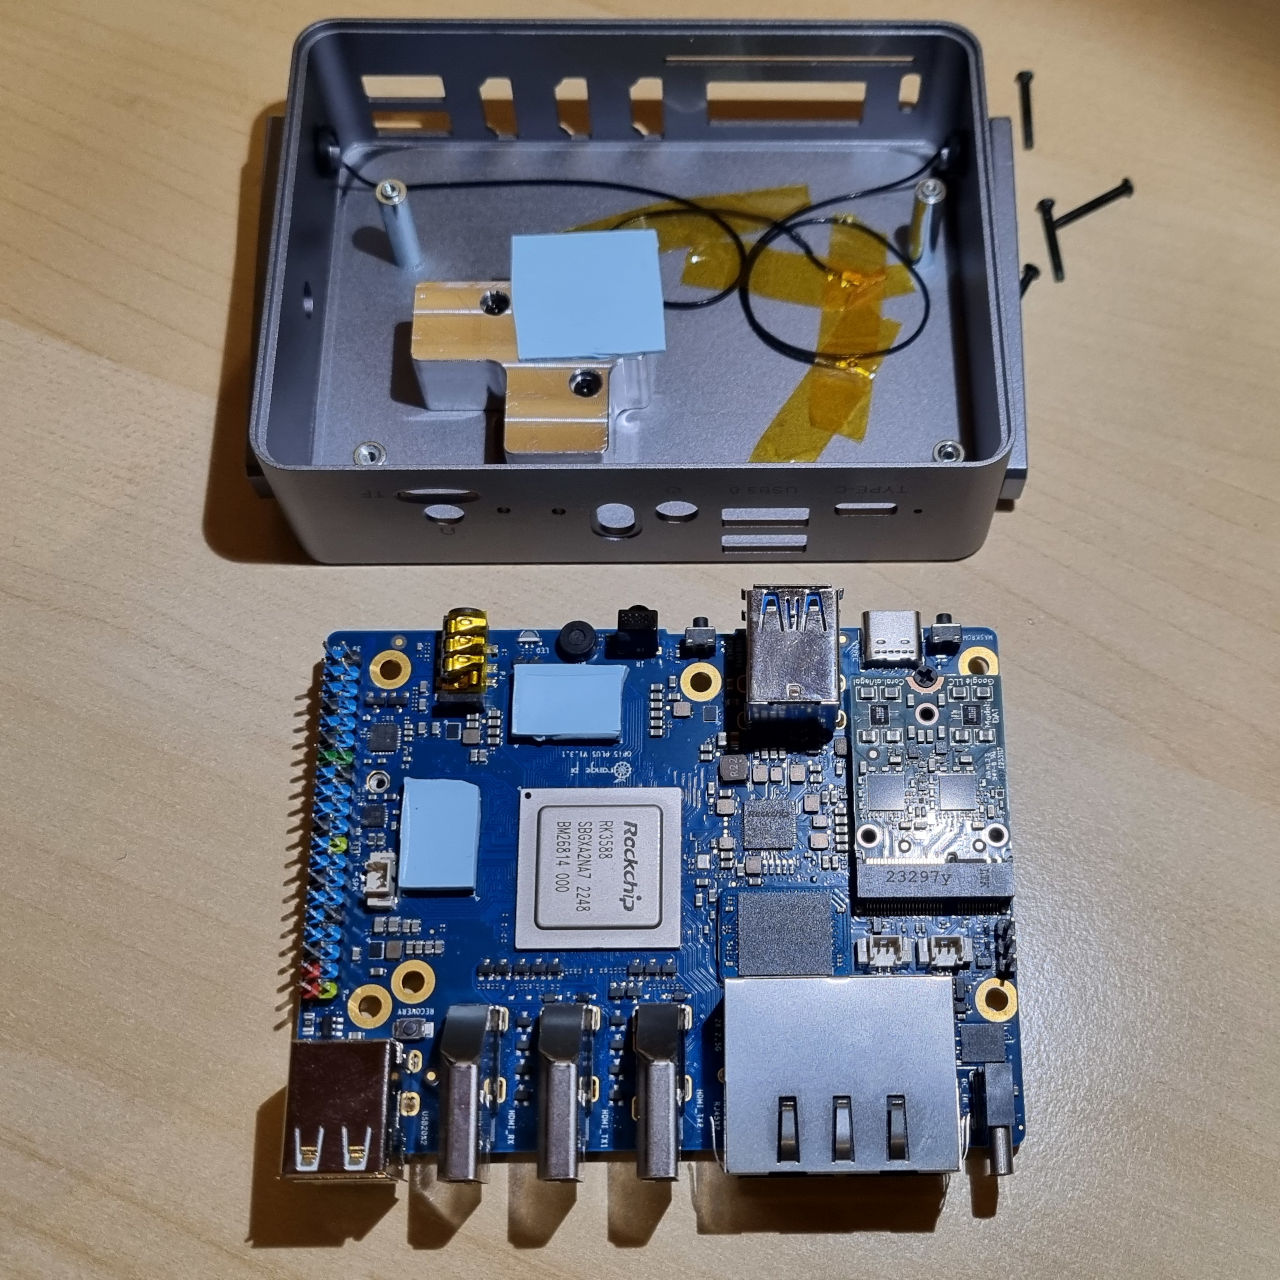
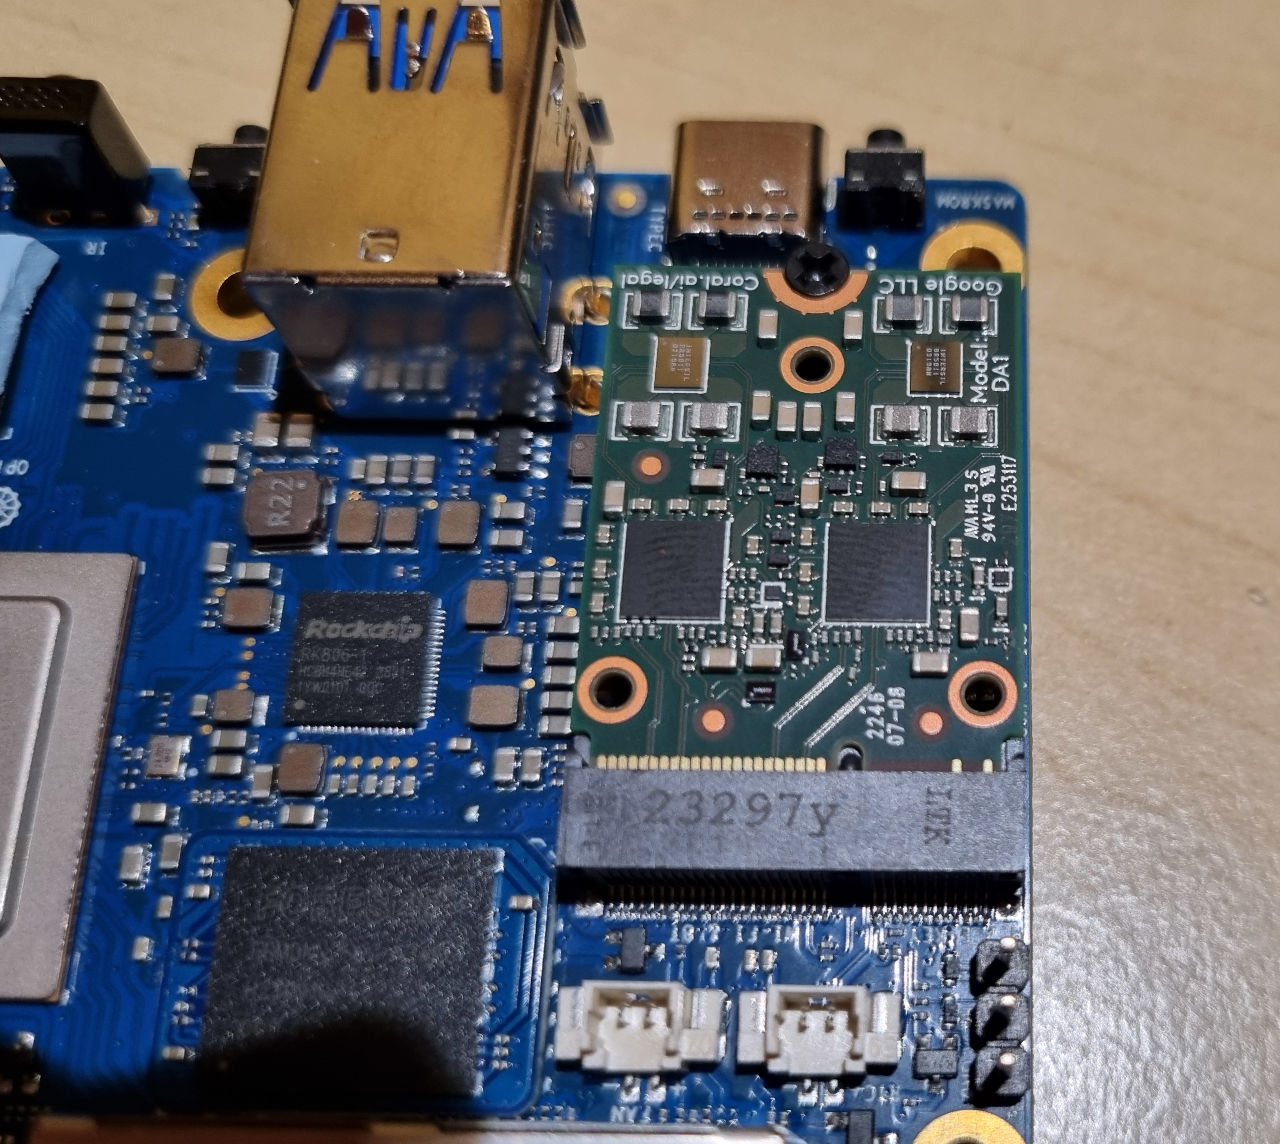
When the board is removed from the case, you can easily see the aluminum piece that allows the heat from the memory chips and CPU to be dissipated through the case (with a heat pad in-between). I also used Kapton tape to protect the WiFi antenna I do not use right now. The Coral TPU is already installed on the M.2 slot on the top left of the board.
Close-up view of the Coral TPU installed in the M.2 slot:
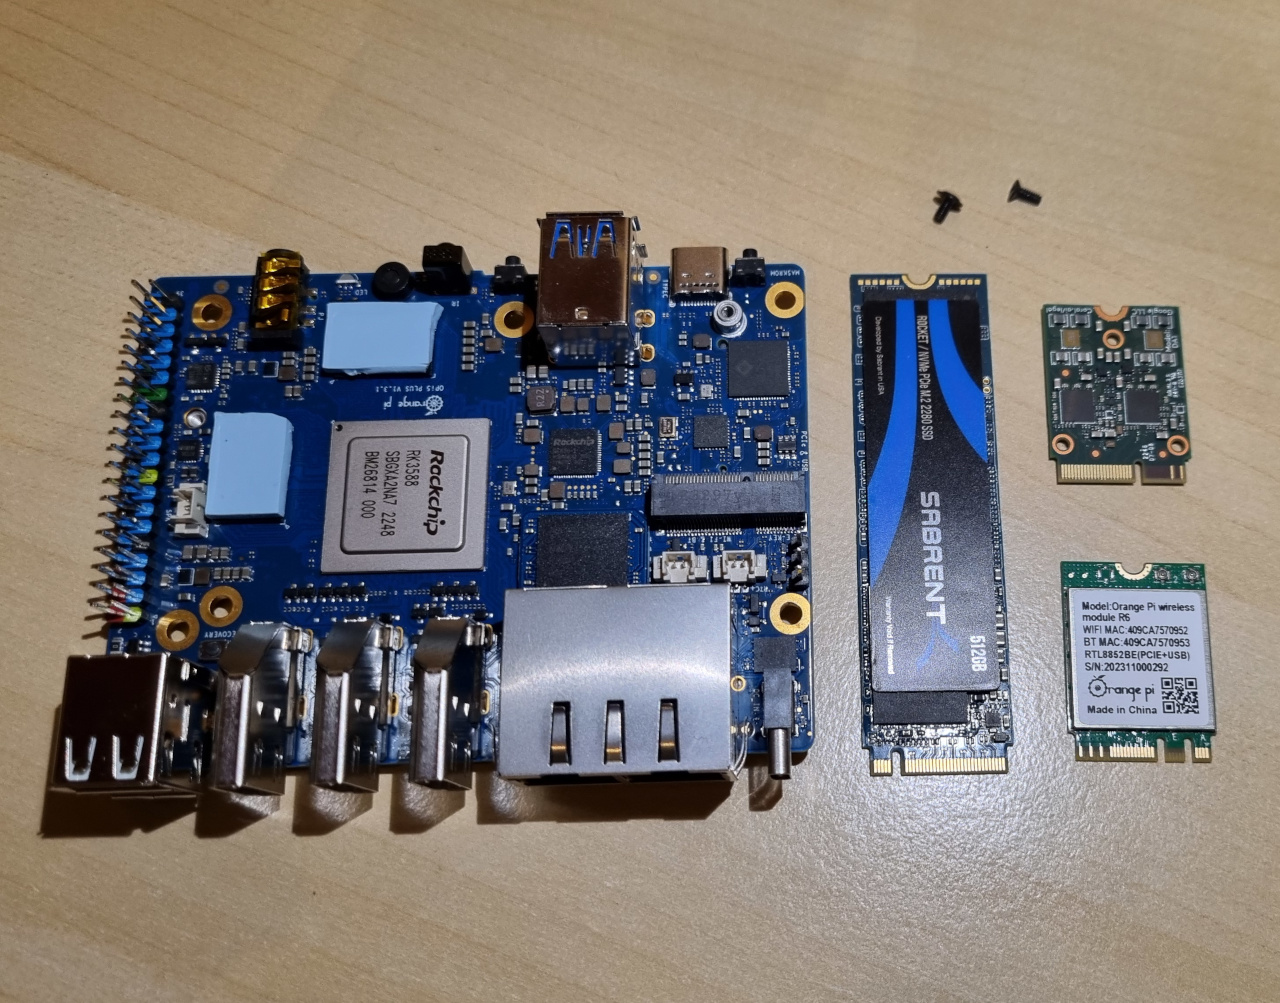
An overview of the hardware : the OrangePi5+ board, a 512GB NVMe SSD, the Coral TPU and the WiFi board (included with the board).
I did a few tests when I received the board : I installed the Debian images provided by OrangePi, checked that the HDMI outputs and the WiFi work, play a bit with desktop environment, play TILVids videos,… Everything worked just fine.
Then I installed the SSD and replaced the WiFi module with the Coral TPU and moved on with my virtualization project!
Setup
I decided to use Armbian for this project. Armbian supports multiple boards, the OrangePi5(+) included, and offers the possibility to easily customize and build your own version of the distribution, which will prove useful a bit later for this project!
But before digging into building Armbian, I’ll simply download and install an image provided by the Armbian team
. At the time of writing this post, Armbian_23.11.1_Orangepi5-plus_bookworm_edge_6.7.0-rc1.img.xz is the most recent build available. It’s based on the mainline kernel version 6.7.
I first installed Armbian on the SD card, and then moved to the eMMC for better performance.
Installing Armbian on the SD card is very simple : download the image and flash on your SD card using the tool of your choice (dd, win32diskimager, BalenaEtcher), insert the SD Card in your OrangePi5+ board, power it up and follow the installer wizard (you need a display and a keyboard for this 1st boot installation process).
There are multiple ways to install Linux on the eMMC, and I decided to use the procedure which consists in first installing Armbian on the SD card, and then downloading and flashing the image on the eMMC from this installation on the SD card and then rebooting without the SD card inserted. Not the fastest one, but the simplest procedure in my opinion.
Now that Armbian is up and running on the board, let’s proceed and install Proxmox!
Proxmox
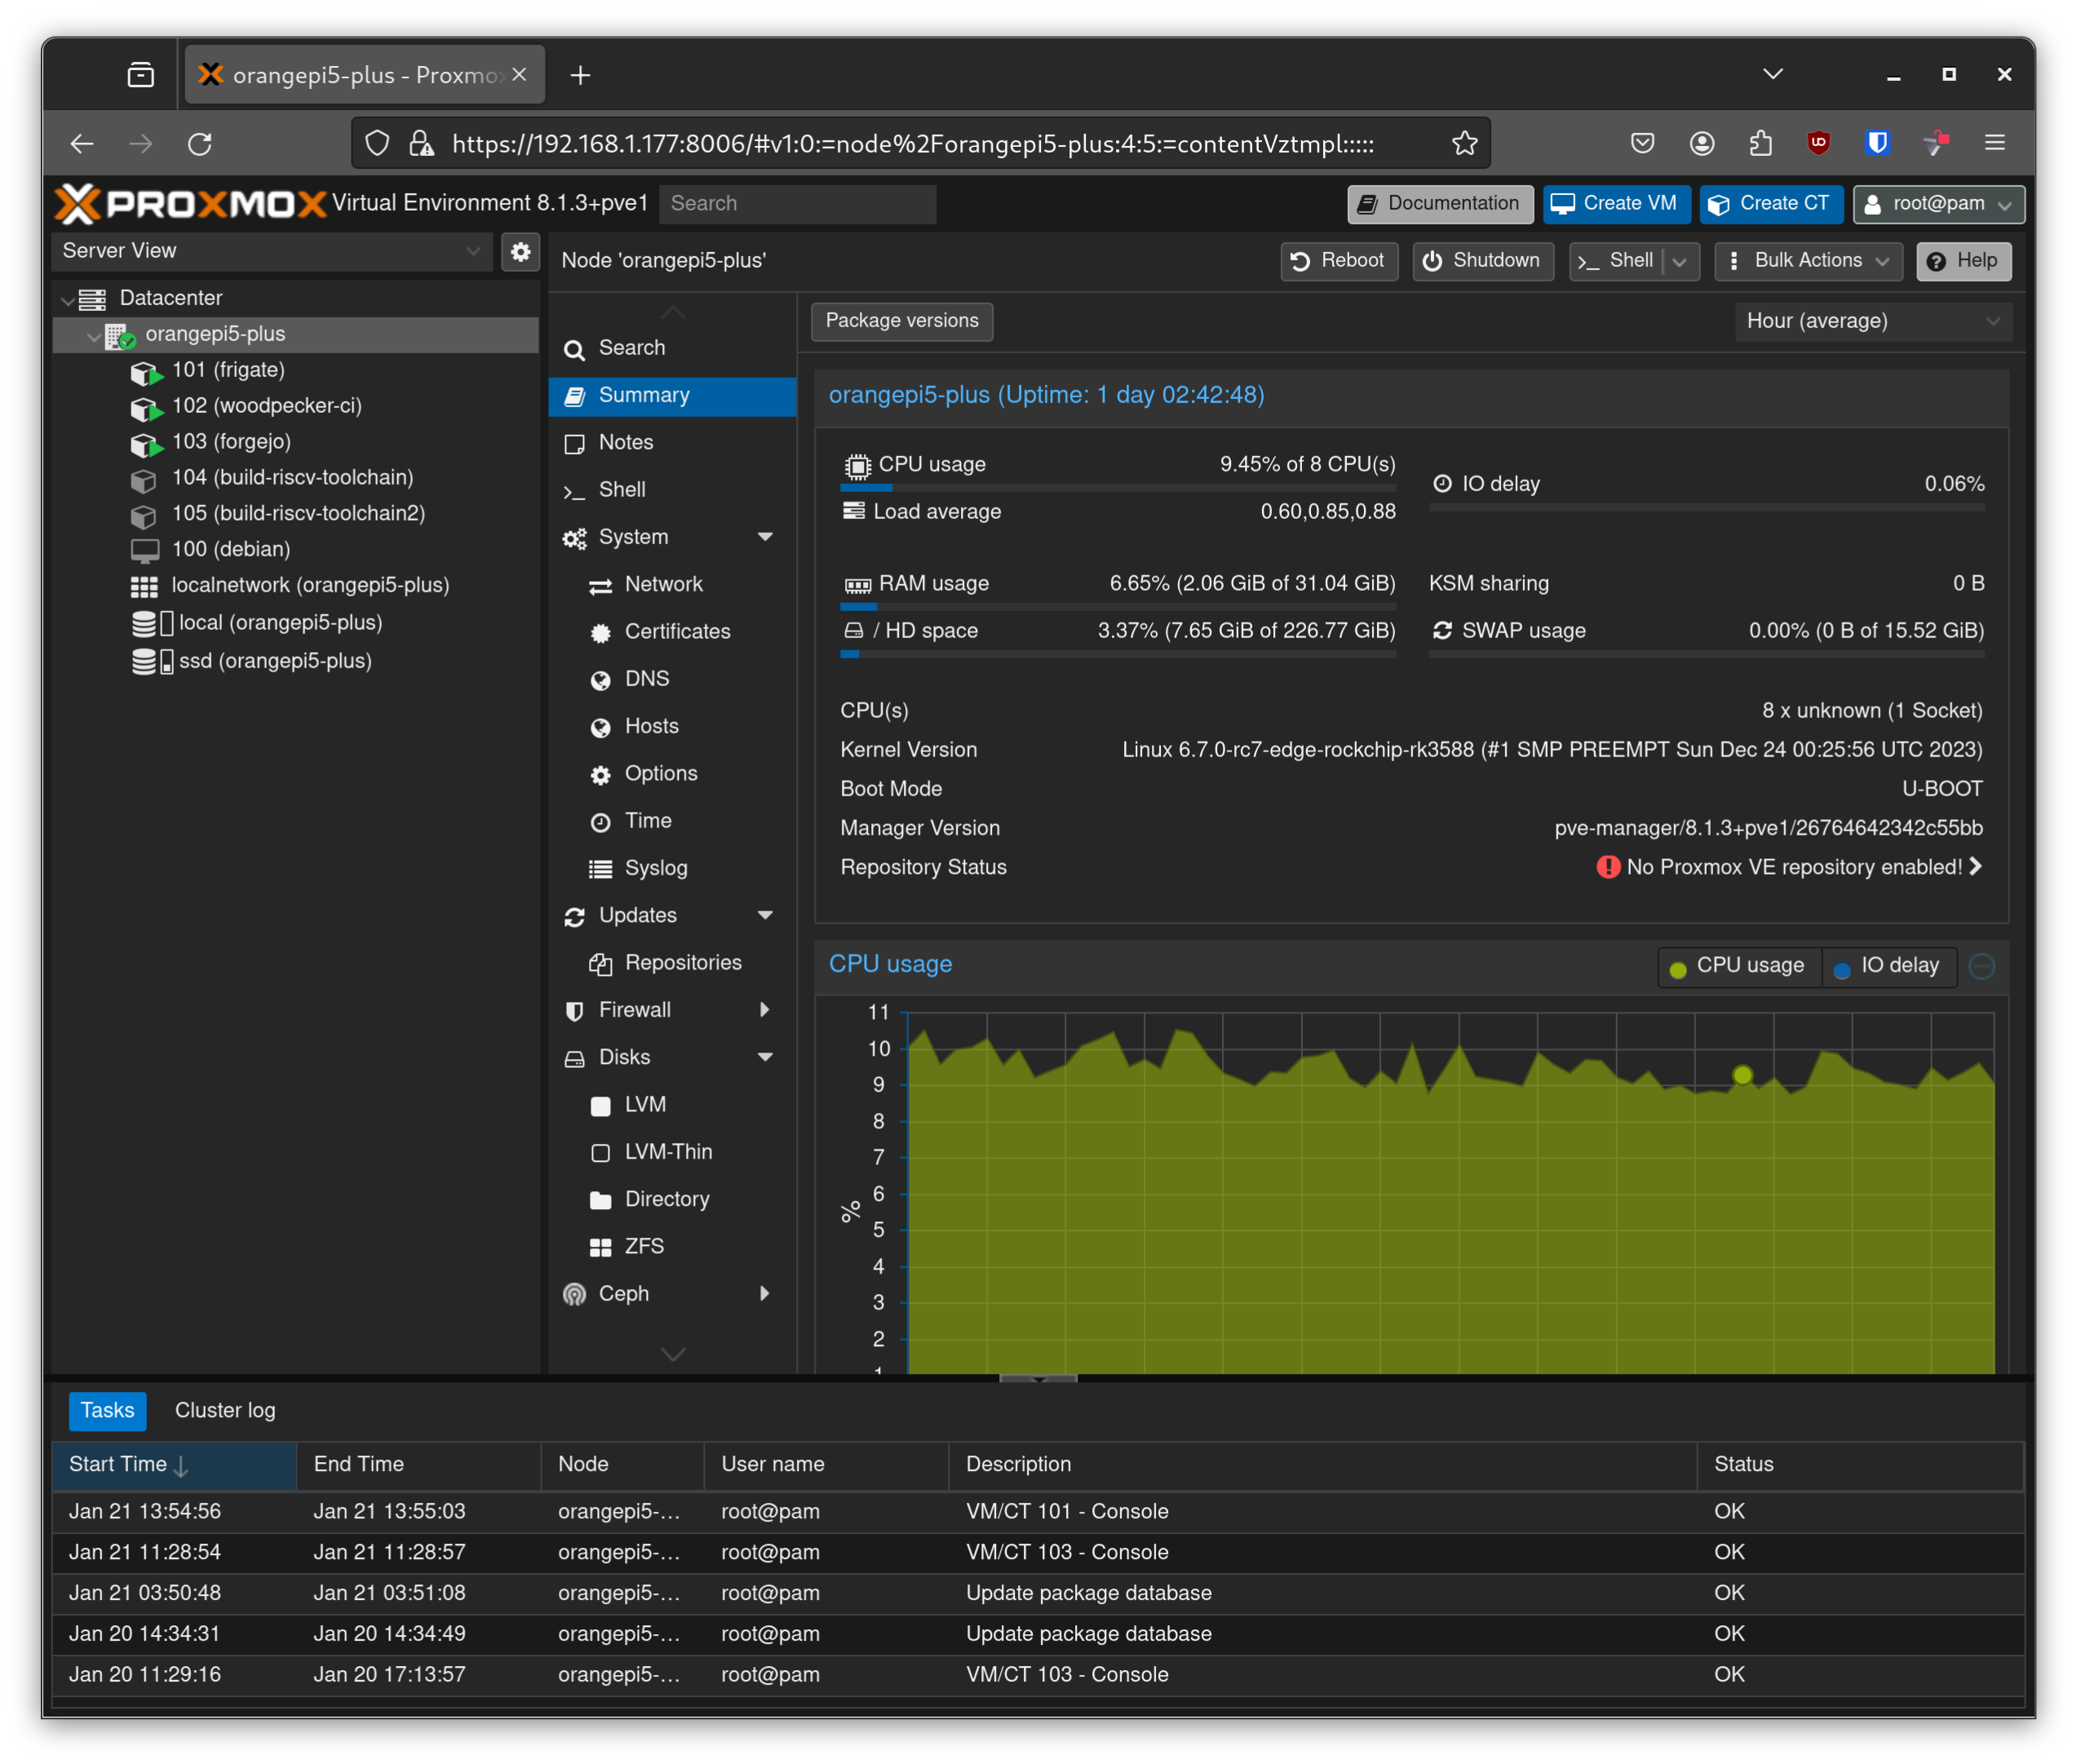
Proxmox is a FOSS virtual environment for your servers. It provides a nice web UI that allows you to easily manage 1 or multiple servers, VMs, containers, networks,… It’s really powerful and yet simple enough to be used by an hobbyist like me.
Installation
The official release of Proxmox does not support ARM/AARCH64 architectures (yet?), unfortunately. However, this project provides a port of Proxmox that runs on many ARM SBCs and, even if the OrangePi5+ is not listed on their README, it’s working really fine on my setup! This port is made available to any Debian based distribution like Armbian, so the installation procedure is very easy:
-
Ensure that your host has a static IP address, and edit your
/etc/hostsfile accordingly -
Add their repo into your system
-
Update your system
-
Install Proxmox and its dependancies using a simple
aptcommand.
And that’s it : Proxmox is now running on your OrangePi5+! Note that I followed exactly the same procedure on the QuartzPro64 and it worked exactly the same! I guess it should run fine on many AARCH64 boards.
At this point, I did experiment a bit with containers and VMs. I was able to run Alpine, Debian and Centos containers and a Debian VM. Everything works fine : text console, graphical UI, networkd, storage,…
Storage
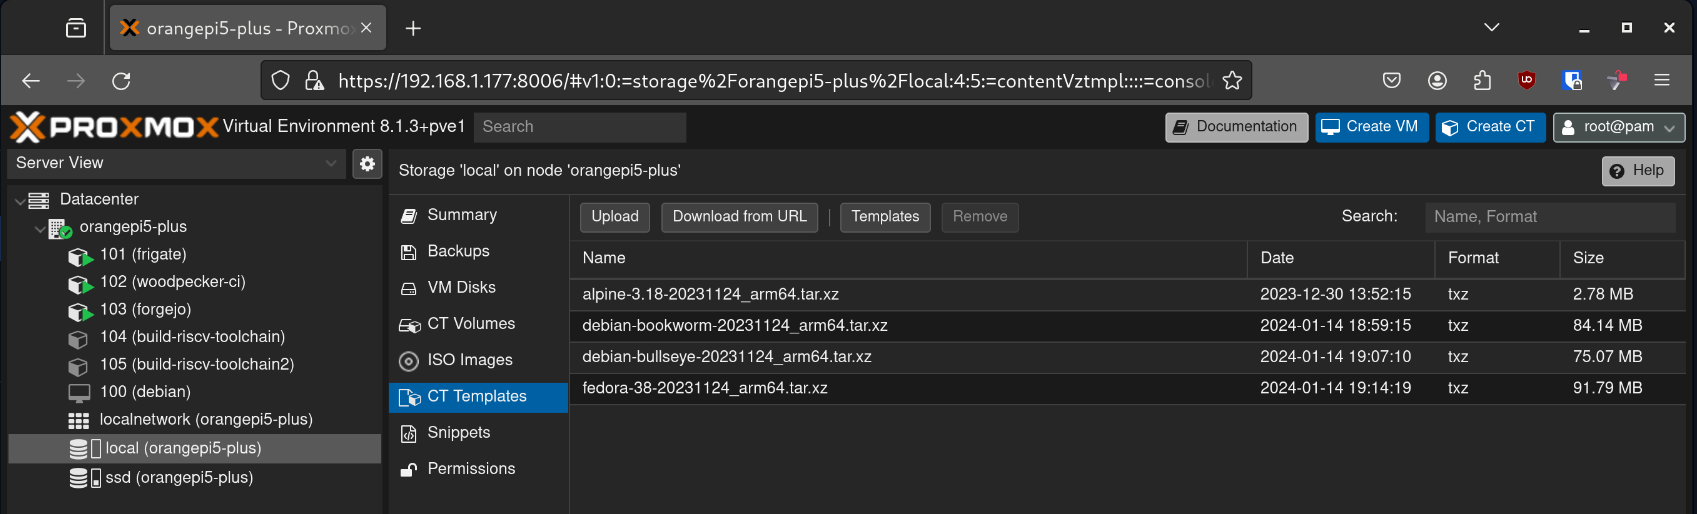
After the installation, a first local storage is created from the OS disk (the eMMC flash memory in this case). By default, this storage is used by Proxmox to store the container templates, VM ISO, backups,…
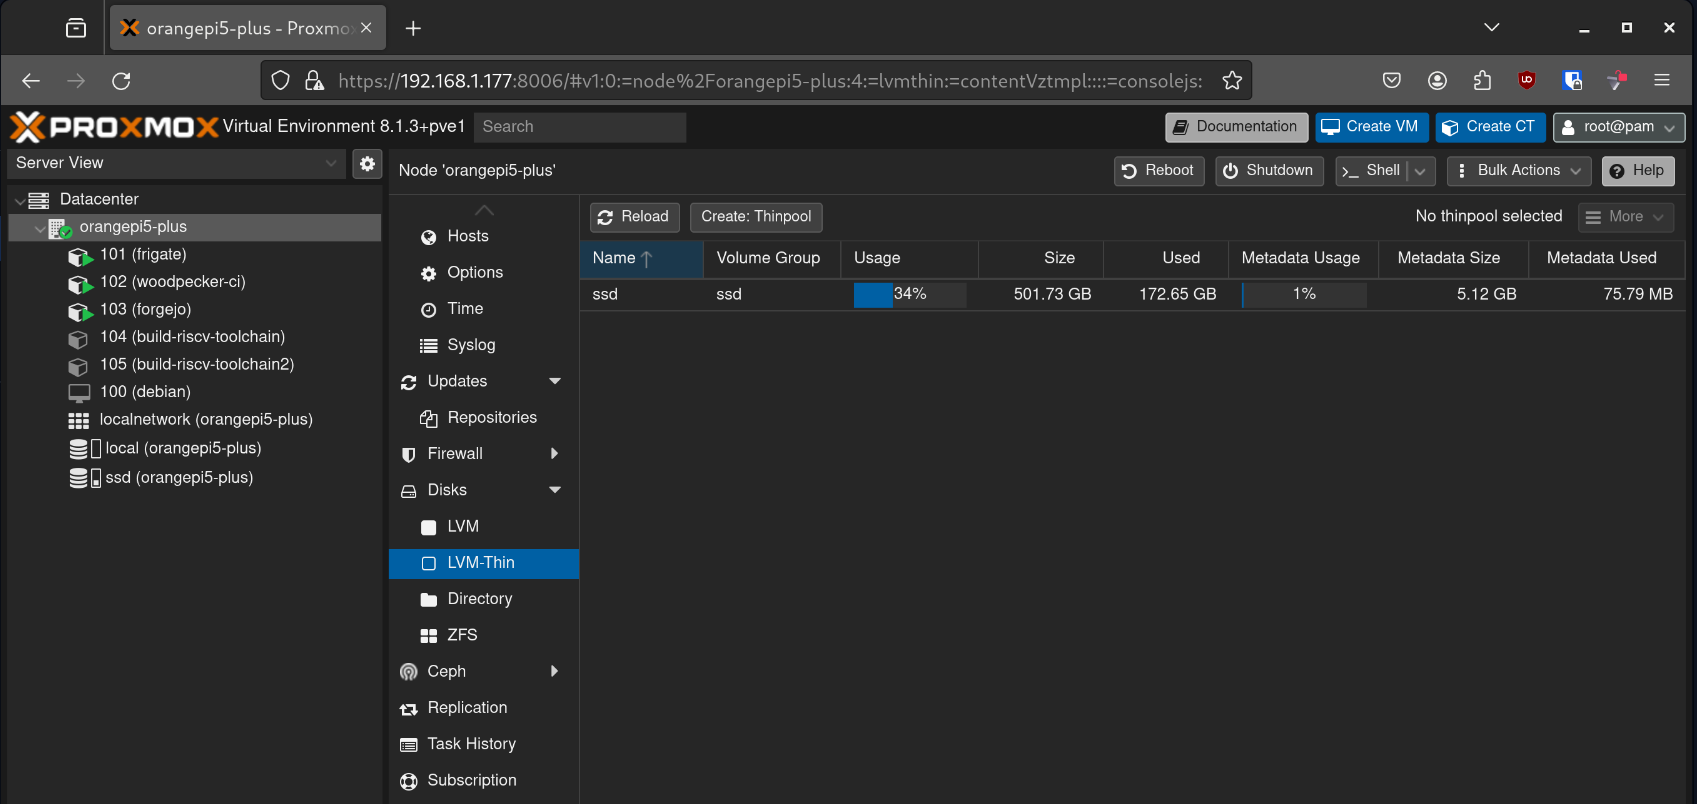
I added a 2nd storage called ssd to store the actual disks of the VMs and containers. This storage uses the NVMe drive I installed on the back of the board, and if configured as a LVM-Thin storage.
Wrap up
I found the installation of Armbian and Proxmox surpringly easy, considering that the support of the RK3588 is still relatively new in mainline kernel.
Since I installed Proxmox on the board, I had the opportunity to enjoy creating containers and VMs to do some experiments, like building a RISCV-toolchain for ARM64 CPU! The RK3588 has a lot of CPU power, and the 32GB of RAM give a lot of head room for many projects!